Fresh out of the box: Getting started with your first ILC
For the more established and experienced photographers of the internet, I will borrow the dedication page to Mark Z. Danielewski’s “House of Leaves:”
This is not for you.
This article is for your elderly neighbor, your young nephew or niece, or anyone whose photographic journey up to now begins and ends with a smartphone.
If this describes you, then hello. Welcome. You, budding photographer, have decided to embark on a new hobby, or an extension of something you’ve enjoyed on a mobile device, and this holiday season you have purchased (or been gifted) an interchangeable lens camera of your very own. You may not know why exactly you wanted or needed one – or even that some cameras come with lenses that detach in the first place.
Let’s unravel the basics here, so you can get from the box-opening to the picture-taking as quickly and as free from headaches as possible.

Opening the box
In most interchangeable lens camera kits, you will have the following:
- Camera body
- Lens (or two)
- Charger
- Battery
- Neck strap
- Software CD (how quaint)
- User manual
- Warranty registration card
The first thing to do is to remove the charger and set the battery on to charge. No point in being frustrated at not being able to take photos because of a low battery.
The second task is to remove the camera and lens, remove the body cap from the camera and the back-end cap from the lens (it will be on the end with a metal or plastic mount with electrical contacts – the front of the lens will likely have the brand name and some other writing on it), and attach them.
There will be red or white markings denoting where to line the lens up relative to the camera, and normally, you’ll turn it clockwise to lock it in – with Nikon lenses, however, you rotate the lens counter-clockwise to attach it.

Get Strapped
Now is also a great time to attach the included camera strap, because nothing is quite so effective at ruining complicated electronics and optics as an accidental tumble onto cement (it happens to the best of us). Also, very few cameras actually come with memory cards these days, so you’ll want to go pick one up – no need to go crazy, a decent 16GB memory card will be plenty for casual shooters, and should be affordable.
Lastly, instead of throwing out that warranty card, fill it out. Cameras are complicated, and should you encounter any strange issues of yours that aren’t directly your fault, the warranty will help you out there.
You can also add your camera to your homeowners’ (or renters’) insurance policy, which may cover theft, accidental damage, or more.

Let’s take some pictures
Okay, now that you’ve sat staring at your camera for a while and have killed the time by reading a couple more online reviews on it, let’s put the charged battery in and actually turn the thing on.
You’ll be prompted to go through and set the date and time, which is advisable – when you go to put the photos on your phone, computer or the internet, the ‘date taken’ is a common method of keeping your images organized. If you notice any odd (read: buggy) behavior from the camera, go ahead and check the manufacturers’ website to see if there have been any firmware updates – and they’ll have easy instructions for installing them.
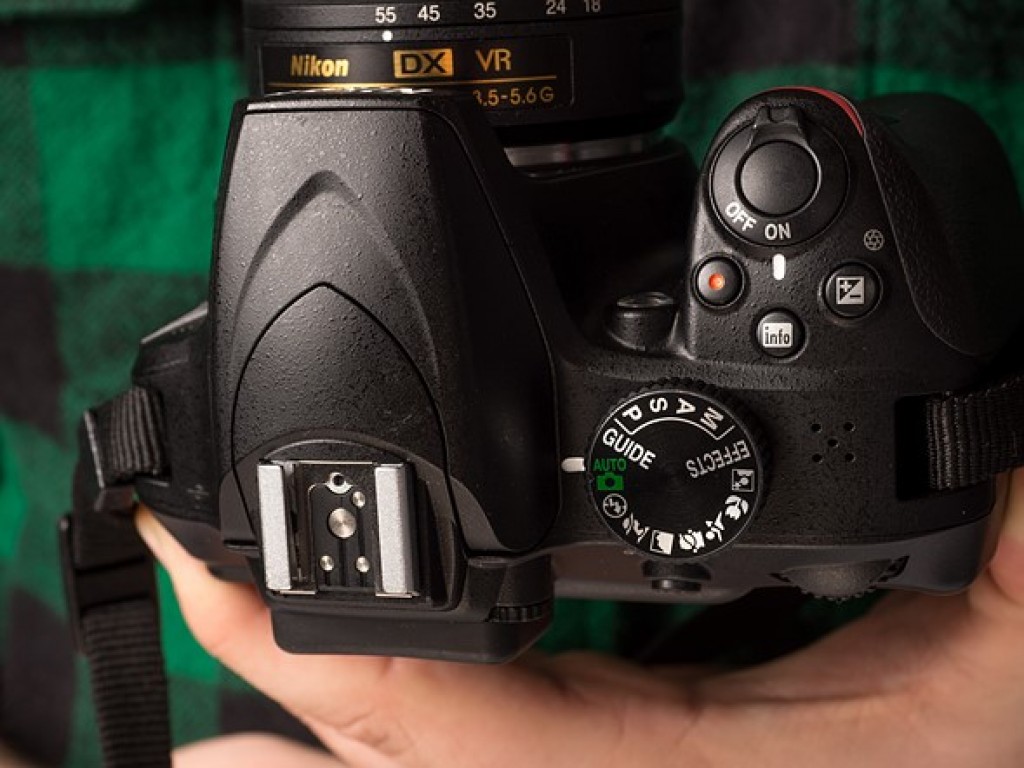
Which mode?
Keep the camera in fully ‘Automatic’ mode, which is usually the only option on the mode dial that’s green (the ‘Mode Dial’ will usually have P, A, S, M options among other icons such as a floating head for the ‘portrait’ preset, some small mountains for ‘landscape,’ and so on). On Olympus cameras, there’s a setting called i.Auto on the mode dial, and on Fujifilm cameras, you’ll want to flip the ‘Auto’ switch, or on the lower-end models, go to ‘SP+’ mode.
The half press
Unlike a smartphone, most interchangeable lens cameras provide you with a two-step process for taking a single picture. You’ll want to press the shutter button (it should be logically placed under your index finger while you hold the camera) very lightly – we call this a ‘half-press.’ What this does is signal to the camera that you’re intending to take a picture, at which time it will focus on whatever is in front of you, and it will pick an exposure (it will decide how bright to make the resulting image). Press the shutter down all the way now, and you’ll be greeted with some sort of shutter noise indicating that a photo has been taken. Yeehaw!
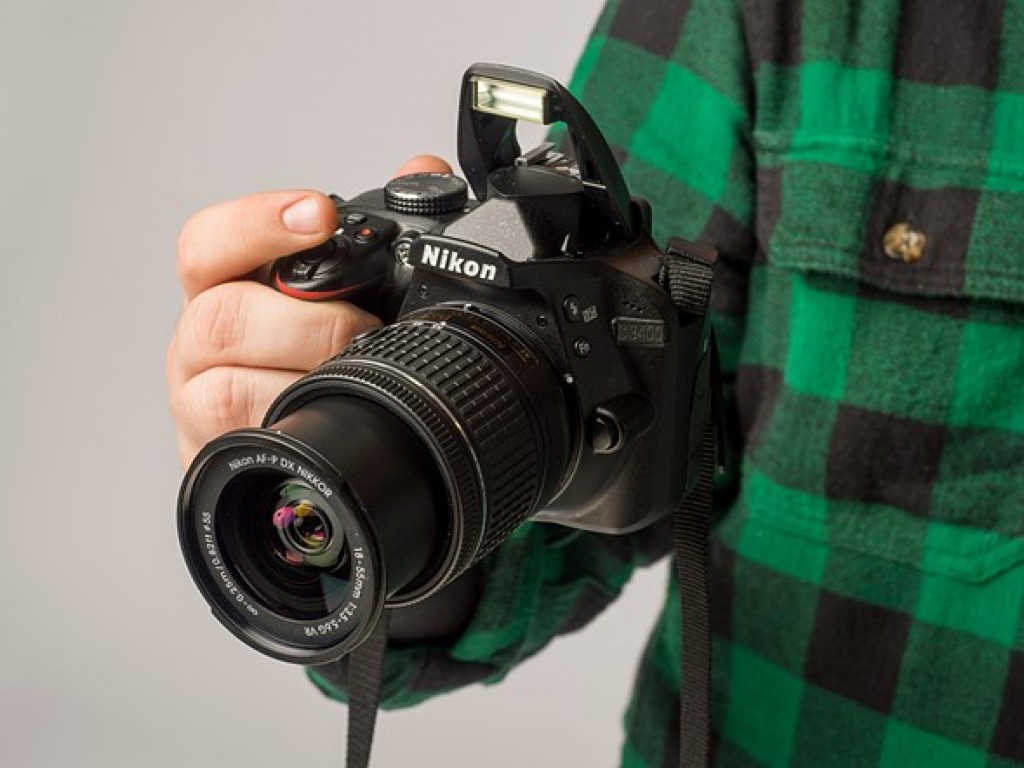
Flash
Many interchangeable lens cameras have flashes that you, the user, must pop up yourself if you wish to use them. General rule of thumb? If your photos are coming out too dark, too blurry or too grainy, pop up the flash. The camera should know to use it when it’s popped up and you’re in an automatic mode.
On some cameras, such as Nikon and Canon models, the camera will choose for you whether to pop the flash up or not. They’re often wrong about this, particularly with subjects that are very far away (the flash isn’t that powerful). However, if you are shooting a photograph of a person on a bright day with the sun overhead, the flash pop will fill in some shadows on your subject’s face – this is called ‘Fill Flash,’ and it’s usually a good thing. The flash can also handy if you’re trying to take family photos indoors and are getting blurry or grainy results.
In any case, those flash-happy Canon and Nikon models have a setting right next to the ‘Auto’ setting on the mode dial, that looks like a crossed-out lightning bolt. That’s the same automatic mode as before, but the camera will refrain from popping up the flash at all.

Easy as that
What’s next? Well, start taking pictures. They can be of anything, don’t worry about it. Take photos of things you find pretty, or funny, or just because you like them. Cats! Always take pictures of cats.
Experiment with putting your subject slightly off-center (look up the Rule of Thirds for more on this – though it’s more of a guideline than an actual rule). It’s a common temptation to zoom in to a subject, instead of using your feet to actually get closer – experiment with both. Think about fun places to go in your own town that you can bring your camera to – a friend’s barbecue, or the zoo, a park, a museum (check photography rules beforehand, though). Be sure and keep the front of your lens clean, preferably with a microfiber cloth – you’ll inevitably get fingerprints and dust on it, which is fine, but they can make everything look a bit hazy.
When you get a little more comfortable, start thinking about using lines to lead a viewer’s eye through the scene. Pay attention to contrast between light and shadow, and look out for interesting textures. There’s tons of free resources on the internet to help you out here.
The most important thing you can do with that spiffy new camera, though? Just use it and have fun.
Sourse: dpreview.com