How to use the LG G5 camera
Compact cameras are old news – the new breed of smartphones is perfect for nearly any snapping situation, and are a lot more portable too.
In fact, they’re getting so good that standing out from the crowd can be tricky – which is why the dual-camera setup on the new LG G5 caught our eye.
But the very thing that makes it intriguing also makes it harder to use: a lot of the more impressive bits are locked away to keep them away from the casual smartphone jabber who might accidentally enter a mode they can’t get out of.
We’ve been digging around in the LG G5’s camera cupboard to find out what’s really going on in there. Here are the tips you need to get more out of your new phone’s camera.
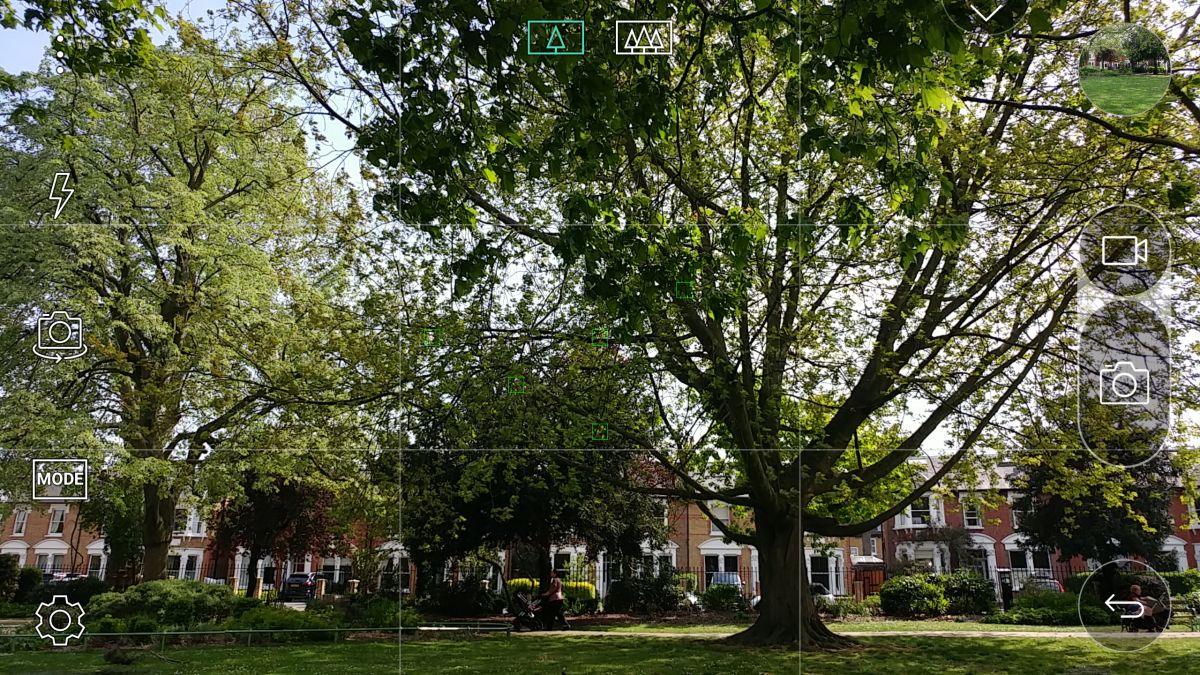
1. How to access manual mode and what it contains
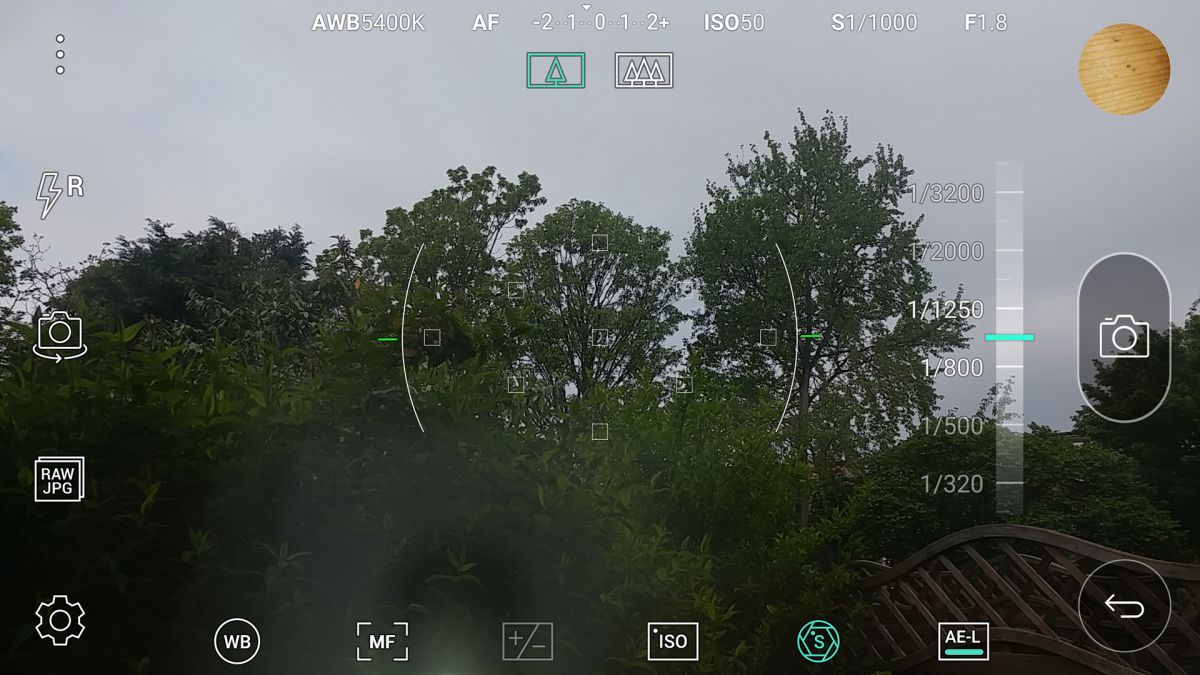
One of the best extra bits of the LG G5 camera is the manual mode. You’ll get to this by tapping the 3-dot icon at the top-left of the screen, which brings up the three main modes: Simple, Auto and Manual.
The main things you control in manual are white balance, focus, exposure, ISO, shutter speed and AE-L. Most of these are simple, but white balance alters the temperature of the color, which lets you compensate for unnatural lighting or create skewed color effects.
ISO determines the sensitivity of the sensor. You’ll need to use higher settings when you’re shooting in darker environments.
The last one, AE-L, locks the exposure, letting you use the light level as a creative effect, making shots either much brighter or darker than the LG G5 would choose normally.
2. How to use manual mode to get noise-free shots
You can use the LG G5 manual mode to force the phone to produce low-noise shots. Auto is always going to use settings that make it easy to get sharp photos, but that is often going to result in them being noisy.
Set the ISO to 200 order lower (it goes down to ISO 50), then use the shutter speed control to see how slow you need to go for low-noise results. With a lower-end phone this wouldn’t work without using a tripod, but as the LG G5 has optical image stabilisation (OIS), you can make the shutter go fairly slow and still get sharp photos.
3. Shooting RAWs: how, why and when
RAW files are what you get when you take the ‘raw’ information from a camera sensor, before the thing’s brain has done a number on it, reducing noise and smoothing things out – but perhaps ruining the photo somewhat in the process.
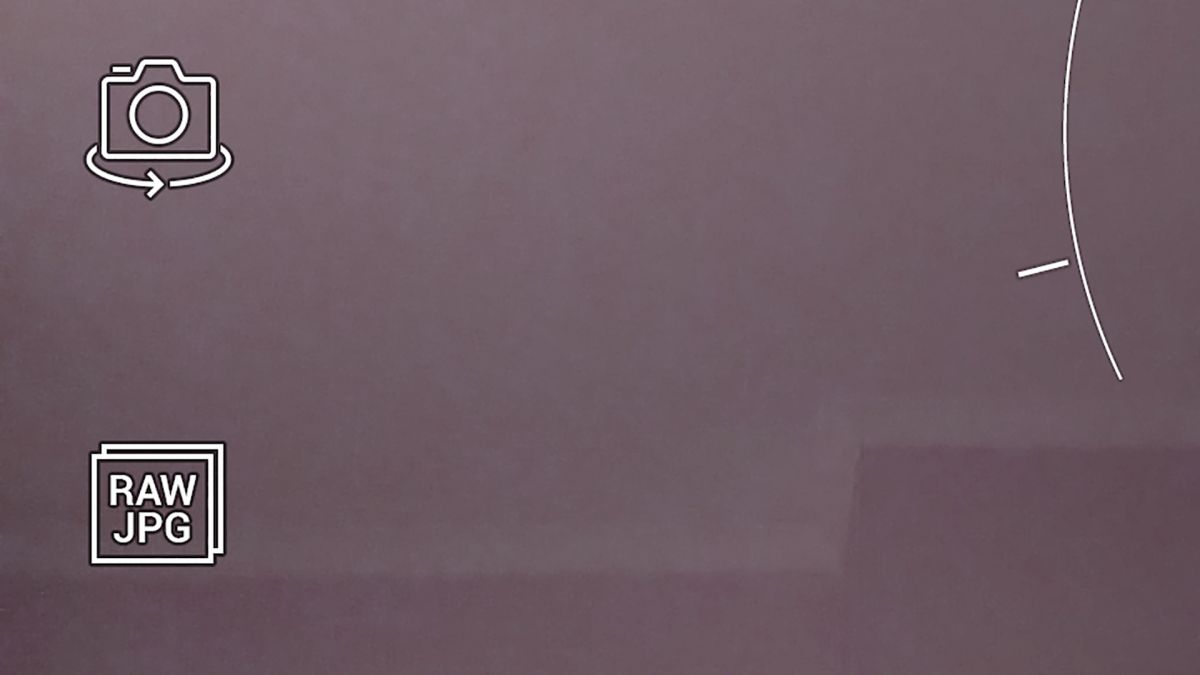
To shoot RAWs rather than normal JPEGs with the LG G5, use the manual mode then tap the second icon from the bottom of the screen, over on the left column.
This will switch to shooting RAW and JPEG files, rather than just JPEGs. RAWs come out as a file known as DNG (Digital NeGative file… no, we’re not sure how those letters were used either), so you’ll need something like Photoshop to open and edit them.
The main reason to use RAWs is that it lets you do your own processing, and you’ll often end up with a little bit more fine detail. This is most useful for bringing out shadow detail, but means you’ll have to be ready to deal with massive, unwieldy files.
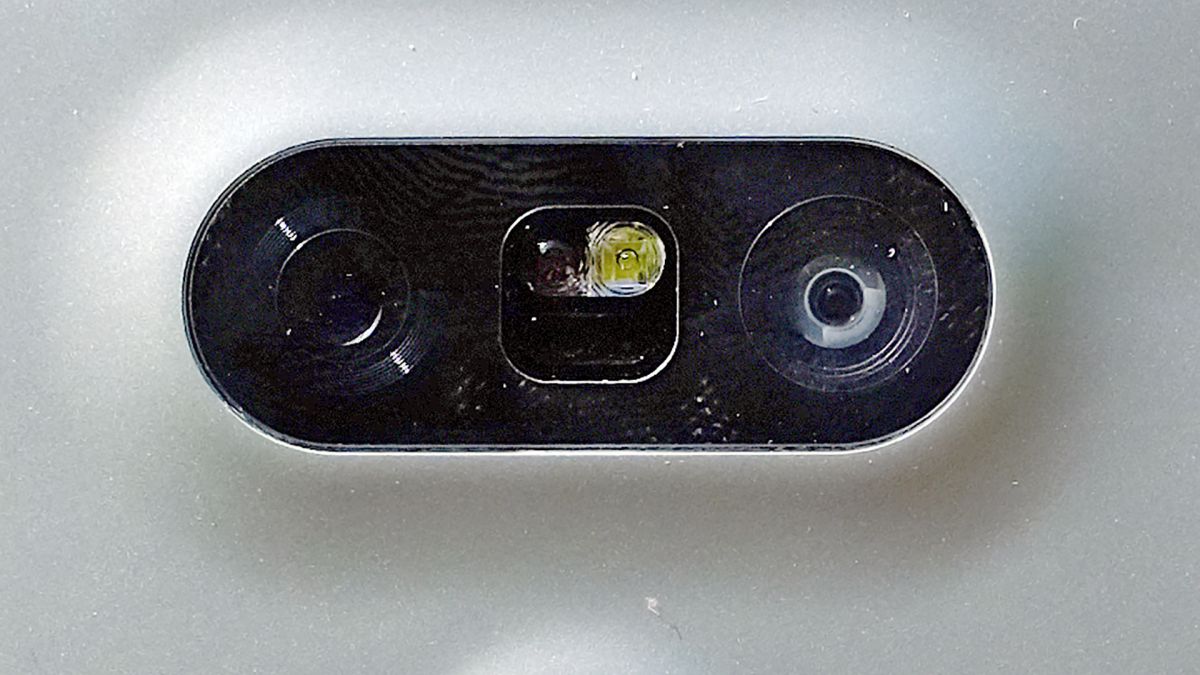
4. Using the second camera as “zoom out”

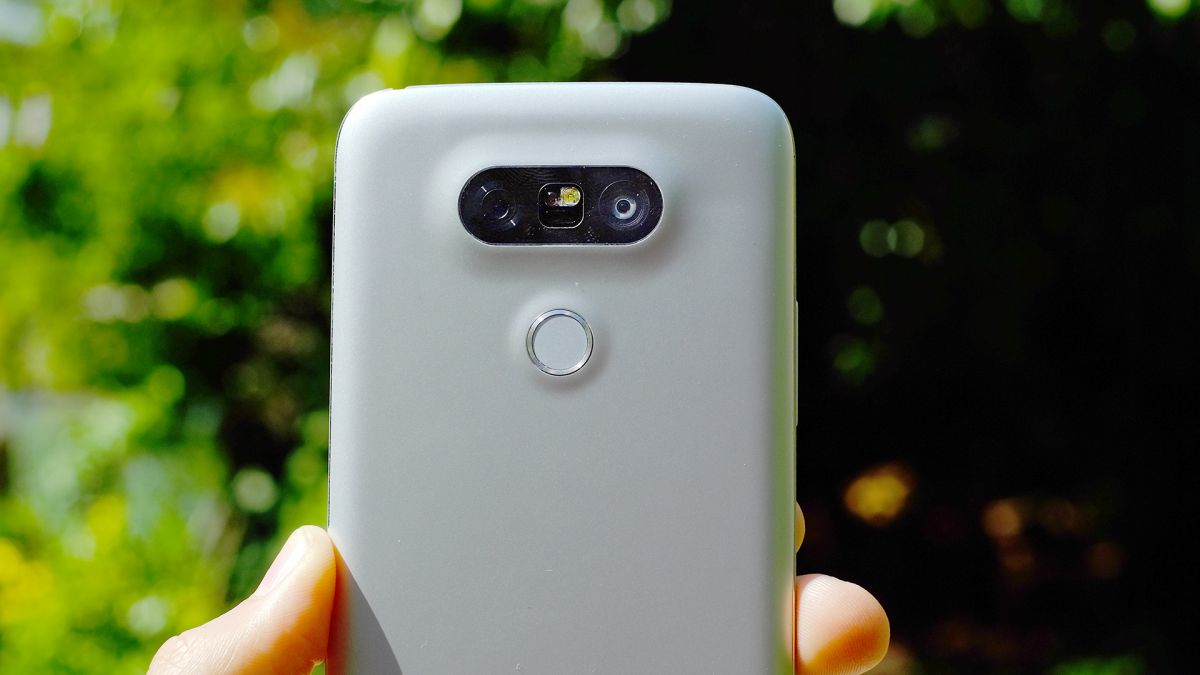
The LG G5’s main camera USP is that it has two sensors on the back, where one has a regular 28mm-ish lens, the other the equivalent of a 20mm fish-eye lens, giving you a 135-degree field of view.
At first it seems like the two are quite separate, that you can only switch between them using the little buttons at the top of the screen. However, you can also just zoom out from the normal view to use the second camera as a seamless composition tool.
Just pinch outwards to start zooming out. This will then bring up a zoom dial to the right of the display, which lets you change the zoom level without any gestures.
5. Use the main camera for the best image quality
The wide angle camera of the LG G5 is one of its big selling points, where a slight fish-eye effect gives your shots a dramatic look.
It also lets you fit much more of the scene into a single photo, almost like a mini panorama, and while you won’t want to use it every day, it gives an nice alternative look.
Do remember though that the main camera is much higher-res, with a 16 megapixel sensor to the wide angle camera’s eight. The standard snapper also has optical image stabilisation, which makes it much easier to get good low-light shots.
6. Changing photo and video resolution
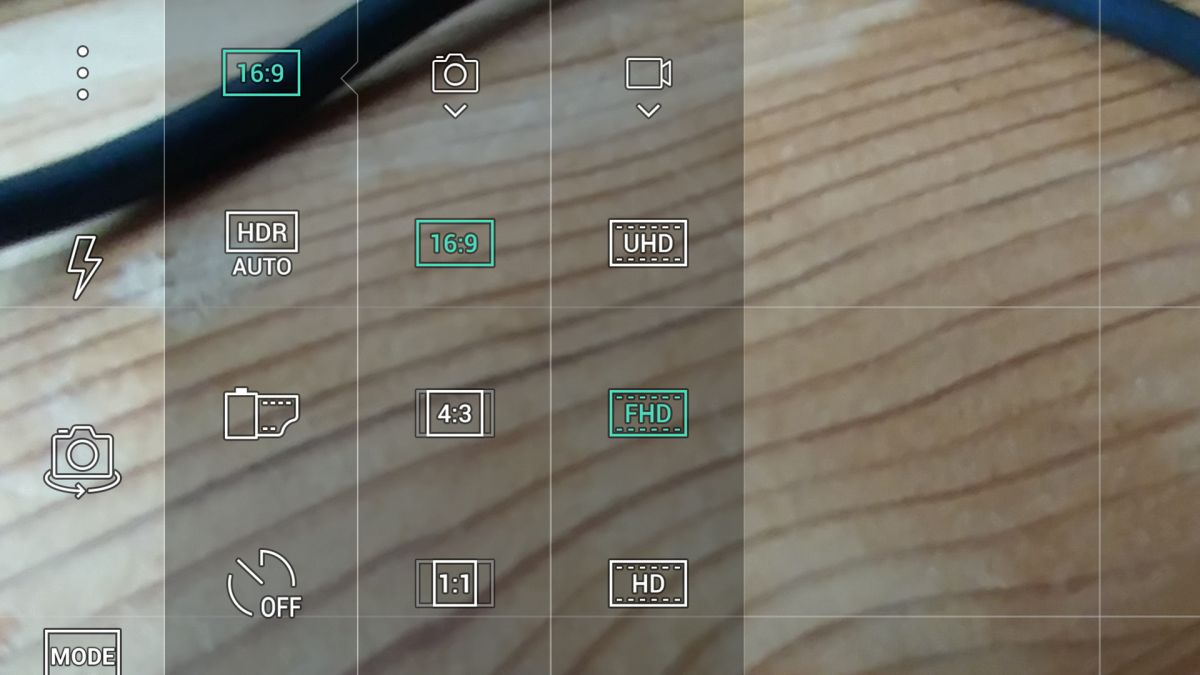
With most phone cameras, you actually get full-resolution results by switching the aspect ratio of your images from 16:9 (the shape of your phone’s screen) to 4:3, because that’s the shape of the actual sensor.
However, both the rear camera sensors in the LG G5 are 16:9 format, so widescreen is the best option here.
If you still want to play with different size images, you can switch to 4:3 or 1:1 images (for that damned perfect profile pic) by tapping on the cog icon at the bottom-left of the screen and selecting the top option in the menu that pops up.
As well as changing the shape of photos, you can alter the video resolution here. By default the LG G5 actually shoots 1080p video. This menu is where you level-up to UHD (the exact resolution of ‘4K video’).
7. Video stabilisation explained

There are two options available to make your videos look smooth even if you’re bouncing about while taking them (within reason – this won’t help that much if you’re on a bouncy castle in an earthquake).
You’ll find the option near the bottom of the camera settings menu, which you access by tapping the cog icon.
Tapping on this flicks between SteadyShot stabilisation and OIS, if you’re using the standard camera lens in Auto mode.
The former is what most phones use, a digital enhancer that uses the edges of the frame as a buffer to smooth-out any movements.
This leaves you with a slightly more ‘zoomed-in’ view than you get when taking photos. That’s one reason why you might use OIS instead, which uses the little camera stabilisation motor to keep your footage smooth.
8. Simple mode: good for simple photography
If you’re giving the LG G5 to a child to take some photos, or you just fancy an ultra-streamline camera experience, don’t forget Simple mode. This is found by tapping the 3-dot icon at the top-left of the camera app.
Simple mode takes away almost all custom features you get with the other options. All you do is tap on the object on which you want to focus and the LG G5 camera app both focuses and takes a shot as quickly as possible.
You still have control over some basic extras, though. Pinching on the screen lets you zoom in and out, while the buttons at the top of the screen let you switch between normal and wide-angle shooting.
9. Use Shortcut key for instant photos
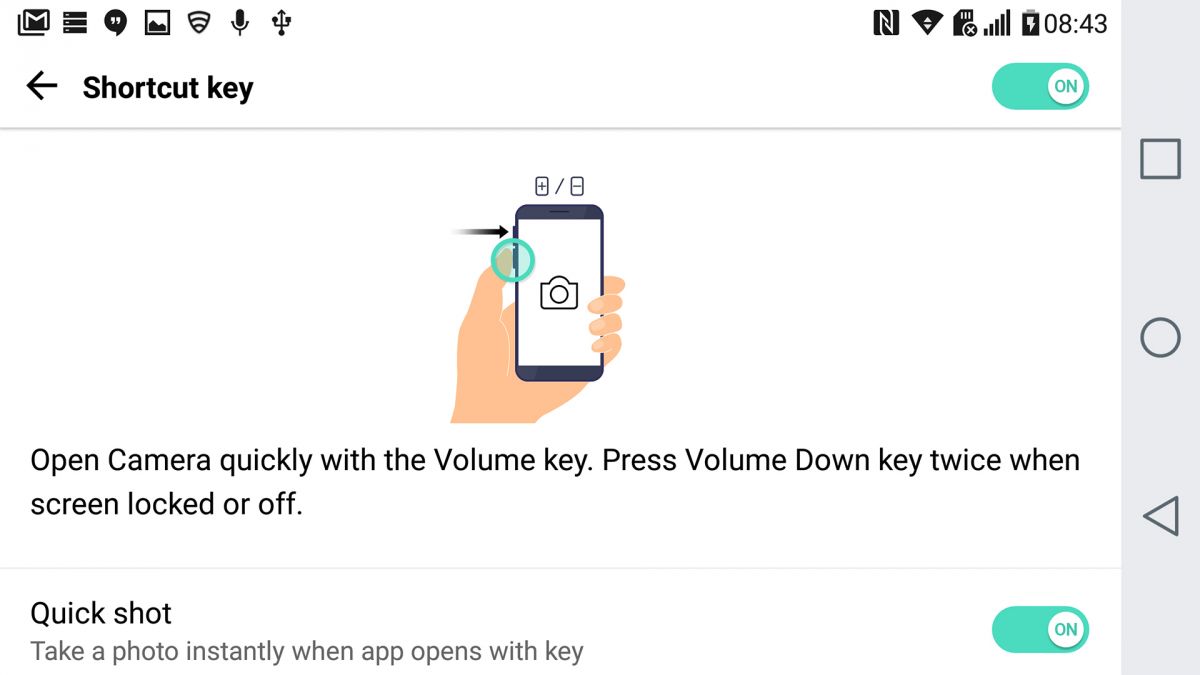
The LG G5 has a special gesture designed to stop you missing that spur-of-the-moment shot that you need split-second timing for. It’s called Shortcut, and is one of the few camera bits not actually found in the camera app.
In the main phone Settings menu, go to the General tab and then select Shortcut key. In here you’ll see a flick switch for Quick Shot. Make sure it’s switched on. This lets you press the volume down button twice quickly when the phone is off to fire-up the camera and take a photo.
10. Timelapse + wide-angle camera = cool movies
The LG G5 has several ‘creative’ modes in its camera app and Time Lapse is one of the more interesting ones. This shoots video, but at 1/15 the normal speed. That means it takes two frames a second rather than the usual 30.
Use this with the wide-angle camera and you’ll get footage that resembles some of the stuff GoPros are used for in action sport footage, at least when they’re not slo-mo’ing (also available in the app).
Unless you’re out for the rickety look, though, you’ll need either a tripod or somewhere sturdy to rest the G5.
You can also change the ‘speed’ of the time lapse video, going as slow as 1/60 of normal speed. There’s a drop-down at the top-left of the screen.
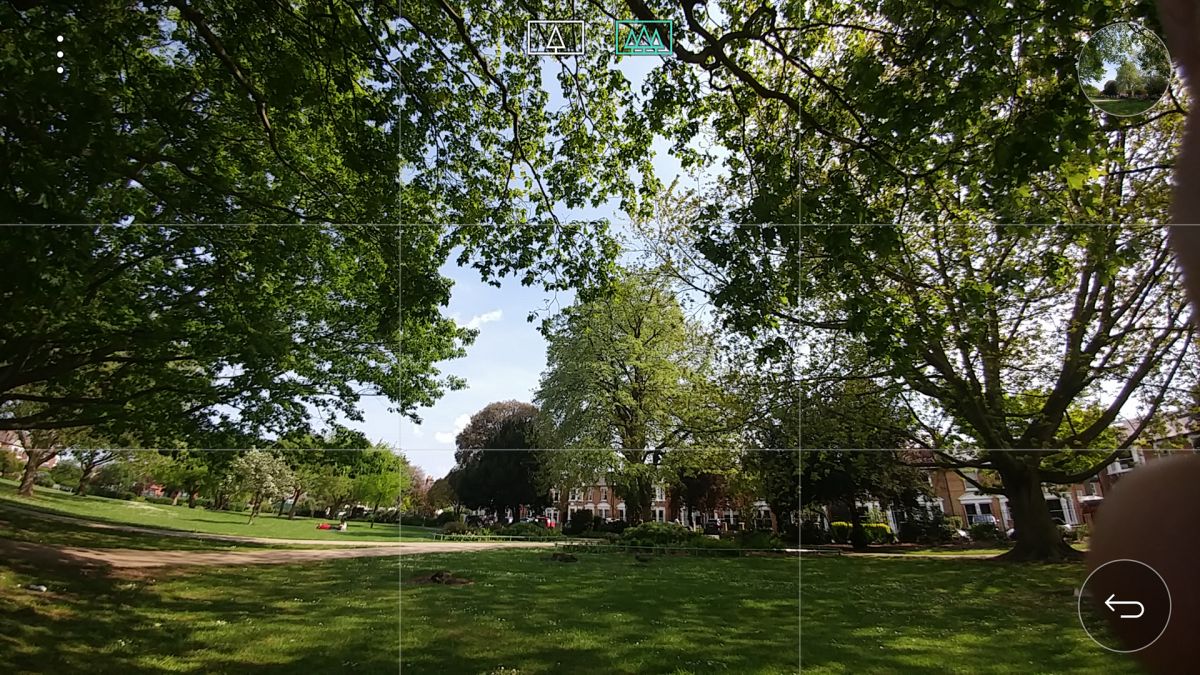
11. Use the grid display for landscape photography
Grid displays in camera apps aren’t considered cool as they make your camera experience look a bit stiff. However, the LG G5 still has a grid option, and there’s a reason for that: sometimes using it is a good idea.
How many times have you ended up with a slightly wonky photo? Gridlines can help with that, giving you another reference point with which to line-up the horizon, as well as helping you work out what you want the focus of the pic to be and placing it front and center.
You’ll find Grid at the very bottom of the camera app Settings menu, accessed by tapping on the cog icon.
12. Use 30sec exposure to make something special
The fun of a proper manual mode is being able to use settings an Auto mode wouldn’t touch. For example, the LG G5 can keep its shutter open for up to 30 seconds. That means it merges all the light information from that half-minute stint into a single image.
There are some very cool things you can do with this, but unless you want pure photographic chaos, we’ll need either a tripod or something like a big clump of Blu-Tac / sticky stuff you use for hanging posters to make a little stand for the phone.
Favorite uses for long-exposure photography include shooting a road, where car lights turn into streaming neon lines, and creating noise-free night shots that, at the extremes of this style of photography, almost look like daylight photos.
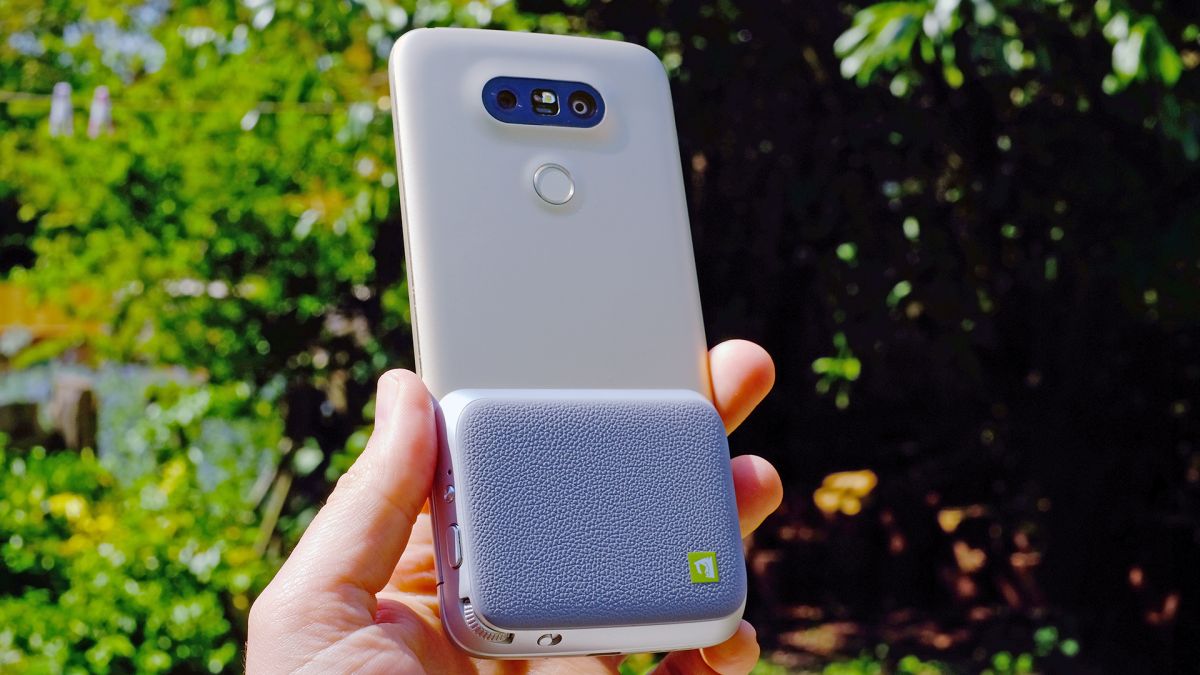
13. Consider the Cam Plus module
The LG G5 is a phone with a series of module accessories that fit onto its bottom and one of them relates to the camera, called Cam Plus.
Its aim is to give you a dedicated camera-like grip and a more camera-like feel. There’s a two-stage shutter button (depress slightly to focus), a zoom wheel and a little flicker switch that boots-up the camera app – all making your camera experience feel that much more professional.
It won’t make your shots radically better, but does give the phone a different feel. The module also has a bonus battery to let you hammer the camera even harder without it dying before dinner.
Source: techradar.com