How to control your smart home with IFTTT
The smart home is the latest craze, promising to link all the devices in your abode together in a flexible, customisable and clever mesh. Do you want to switch on or dim lights from your iPhone? There are bulbs that enable that.
Concerned about security? Use sensors to monitor movement, the opening of doors or windows, or just people’s presence. Better still, why not use sensors to switch on lights when someone enters a room?
It seems like the possibilities are endless. Before rushing out and buying any kit that takes your fancy, remember this: there’s still no industry-approved standard for smart homes and the Internet of Things (IoT), which means devices from one manufacturer won’t necessarily work with another.
IFTTT works on a beautifully simple process: ‘If This, Then That’. The ‘this’ part is called a trigger, which subsequently leads to ‘that’, which is an action. Manufacturers and services are falling over themselves to work with IFTTT, and there are over 310 channels, with more added daily, that provide both triggers and actions for specific smart devices as well as other platforms.
IFTTT works brilliantly with your iPhone, iPad, Android device or Apple Watch. You’ll find dedicated channels for your phone’s contacts, locations, photo library, reminders, and Safari Reading List – mostly acting as triggers, but with the occasional action, too. For example, you could create a recipe that links the iOS Location Channel with your Nest Thermostat so it knows to switch on your heating when you leave work for the day.
The trigger goes off when you – or, to be precise, your iPhone – leaves your workplace, giving your home’s heating system time to warm up so your home is comfortable when you get there.

Work with IFTTT
Start by visiting ifttt.com, clicking Sign Up and providing an email address and password for your new account. Once that’s done, you’ll see a navigation bar at the top, providing a handy search tool, a shortcut to your recipes, plus options for browsing recipes and channels.
Click your account name here to configure your preferences, such as adding two-step verification to enhance account security, and also to develop your profile for others to read, should you subsequently share your recipes.
Let’s start by browsing and connecting to channels, so click that word at the top of the page. Channels are split into various sections – keep checking back for new ones, which appear at the top of the list. You’ll see a combination of online services such as Blogging, Lifestyle and Productivity, with smart technology from Connected Home to Fitness and Wearables, via Mobile and Security and Monitoring Systems.
Click a channel to view it in more depth. You’ll see a list of popular recipes, and when you scroll down you’ll see all the triggers and actions that channel supports. You’ll also see a large Connect button. Click this to begin the process of connecting the channel to your account. You’ll either be prompted to log in to the account for that service, or you’ll be directed to another app, the latter being the case on your iPhone or iPad.
Once logged in, you’re instructed to authorise the connection, and then you get to configure it, if necessary; for example, choosing exactly which smart devices you want to give IFTTT access to. Once your channel is in place, it’s time to build your first recipe. This is straightforward, and our step-by-step guide below walks through the process.
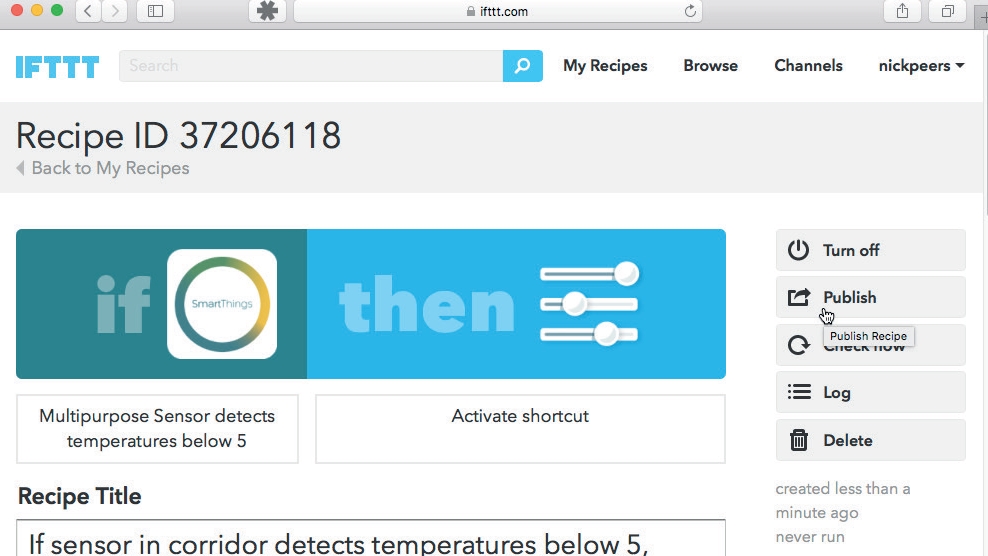
Once the recipe is in place, it’s automatically switched on and will monitor for triggers. You can manage your recipes in the site’s ‘My Recipes’ section. Here you can enable and disable recipes, trigger them manually, view a log of their activity, and make changes or delete a recipe entirely. You’ll see recipes are divided into the IF and DO categories, and that three separate DO apps are available; of those apps, DO Button is the most useful to smart home enthusiasts.
Here you simply set up an action that’s triggered with a tap on a screen.
How to create an IFTTT recipe
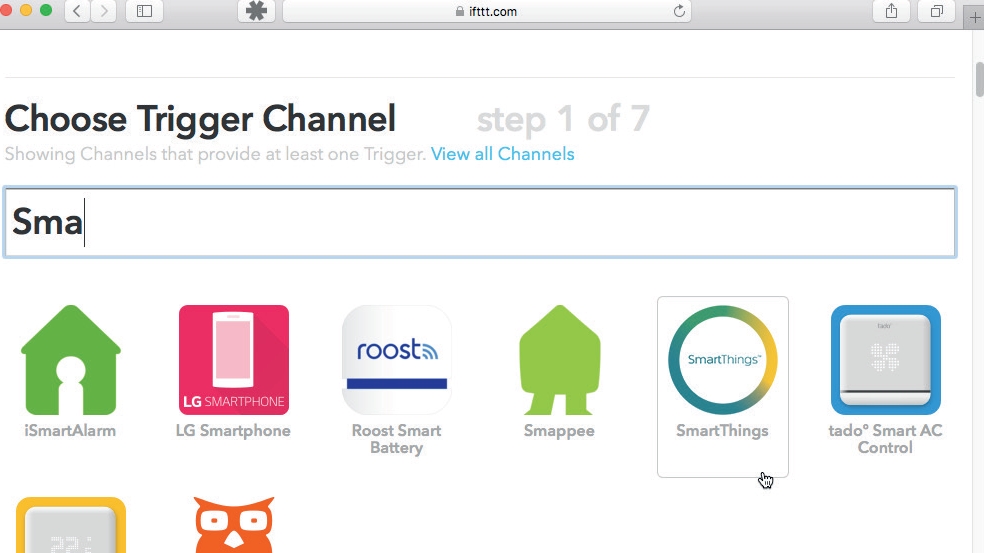
1. Select a trigger channel
Log in at ifttt.com and click My Recipes, then Create a Recipe. Click the highlighted ‘this’ word and pick the SmartThings channel.
Click Connect, log in to your SmartThings account (registering’s free, if you want to check it out), and pick the ‘Temperature drops below’ trigger.
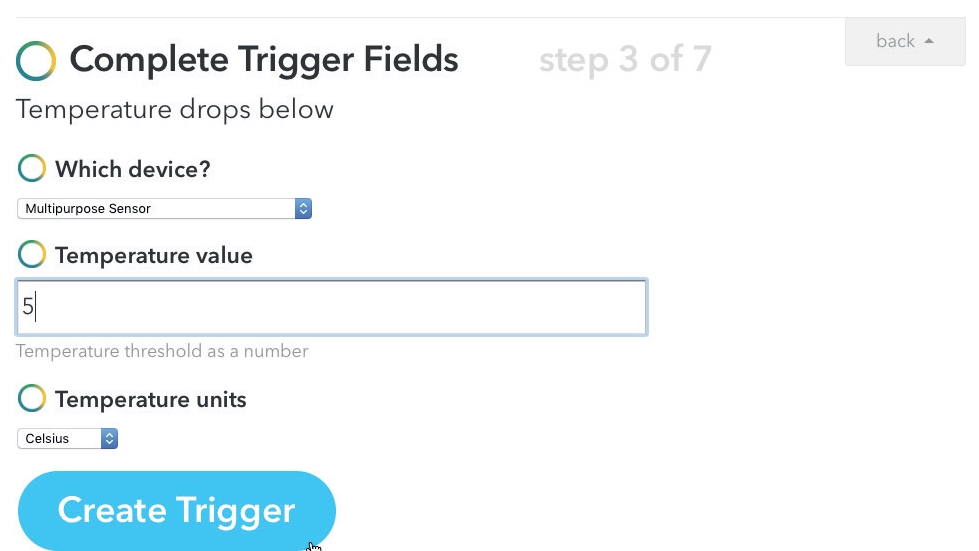
2. Configure your trigger
Under ‘Which device?’, select your device that contains a temperature sensor. Set the unit of measurement to Celsius, and then set the temperature value at which you want to trigger an action.
With these things done, click the Create Trigger button.
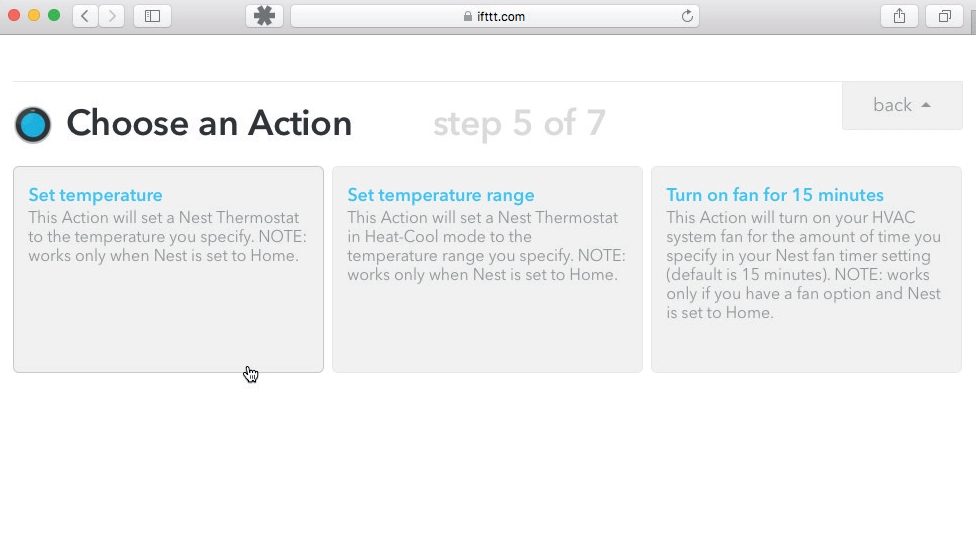
3. Set an action
The ‘if that then this’ phrase on the page will be updated with a summary of your trigger. Next, click ‘that’ to set up your action.
Select the Nest Thermostat channel to view a list of actions that are available to use with it, then select the ‘Set temperature’ action.
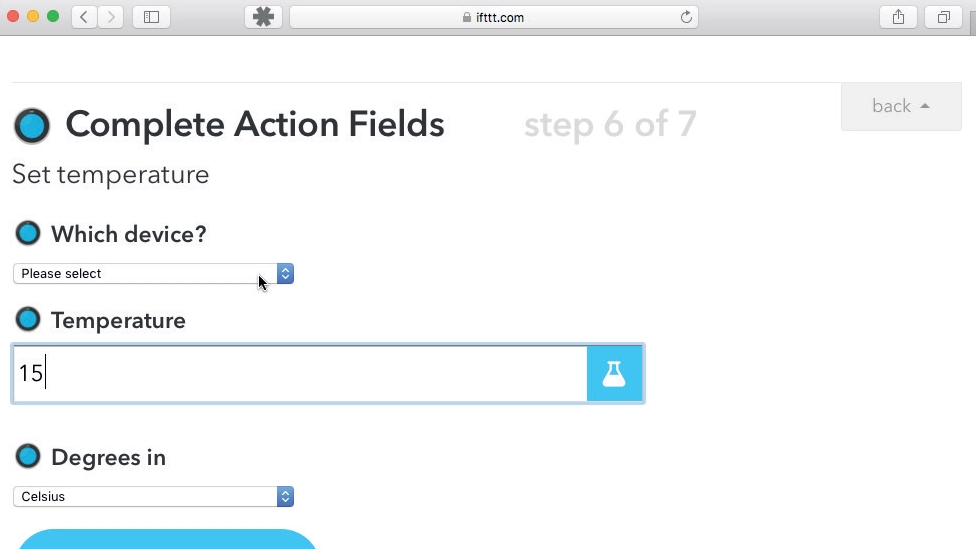
4. Configure your action
As in step 2, select your thermostat from the ‘Which device?’ pop-up menu, then specify the temperature you want your heating system to raise the room temperature to.
Again, make sure you switch the unit of measurement to Celsius as well.
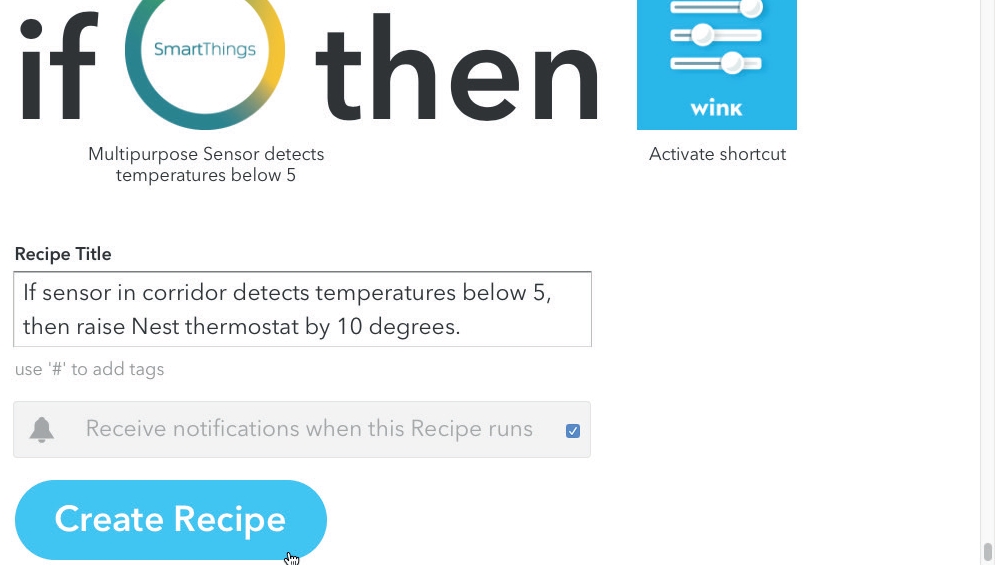
5. Set a recipe title
Click Create Action, then review your recipe: click Back to return to the previous step if you need to make any changes.
Otherwise, provide a descriptive title for your recipe, then tick the notifications box to receive updates whenever the recipe runs.
6. Try out your recipe
Click Create Recipe. You’ll find your recipe is now enabled within the My Recipes section of the site. When the temperature sensor detects the room is cold, you should find that IFTTT automatically boosts your heating, after a short pause, via the Nest Thermostat.
Source: techradar.com